Integrating Shippo with your eCommerce store optimises your shipping operations by giving you access to real-time rates, streamlined label printing, and efficient package management. It simplifies the shipping process, enabling quick comparisons of live shipping rates, batch order processing, automatic order fulfilment, and the ability to add markup fees for additional revenue.
Step 1: Generate a Live Token in Shippo
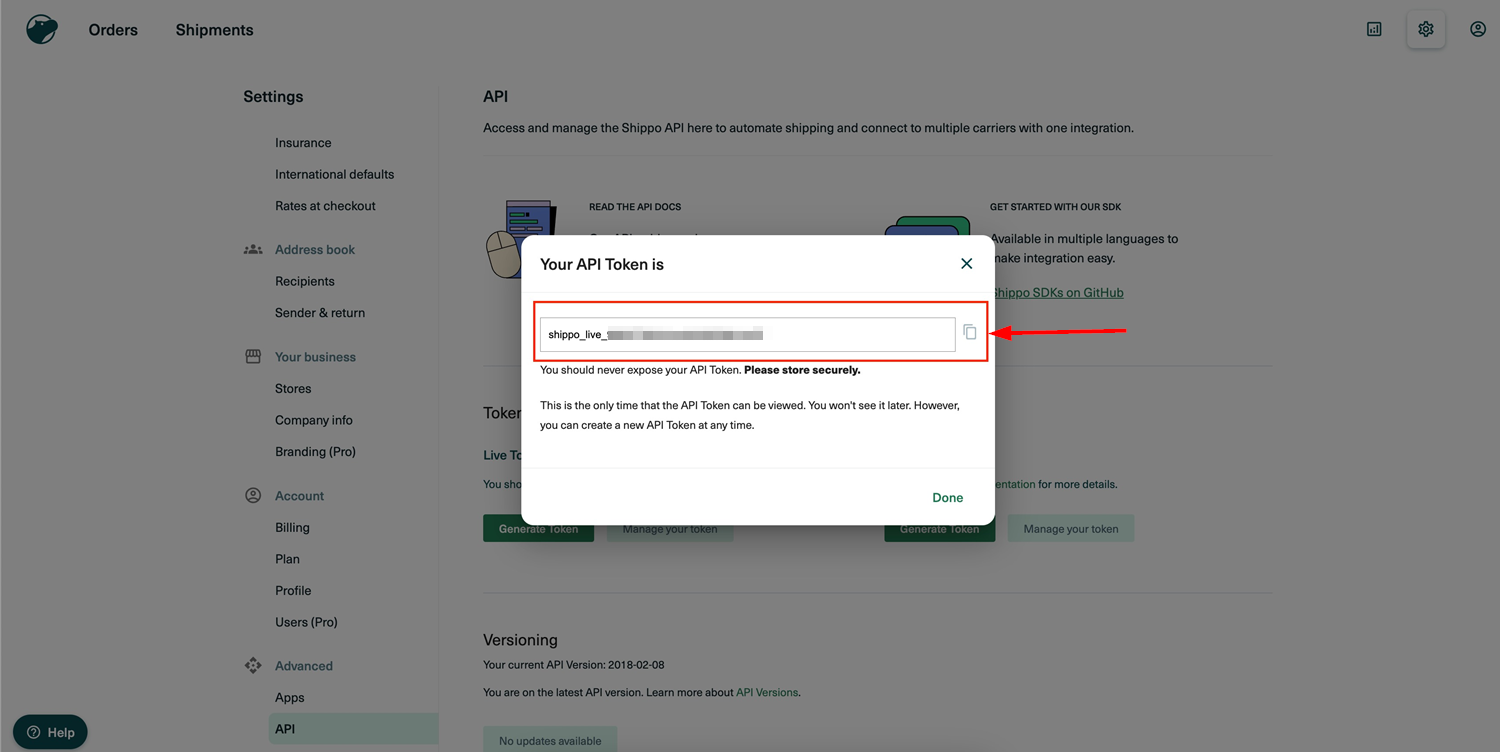
Generate a live token in Shippo by navigating to Settings > Advanced > API > Live Token. Click "Generate Live Token".
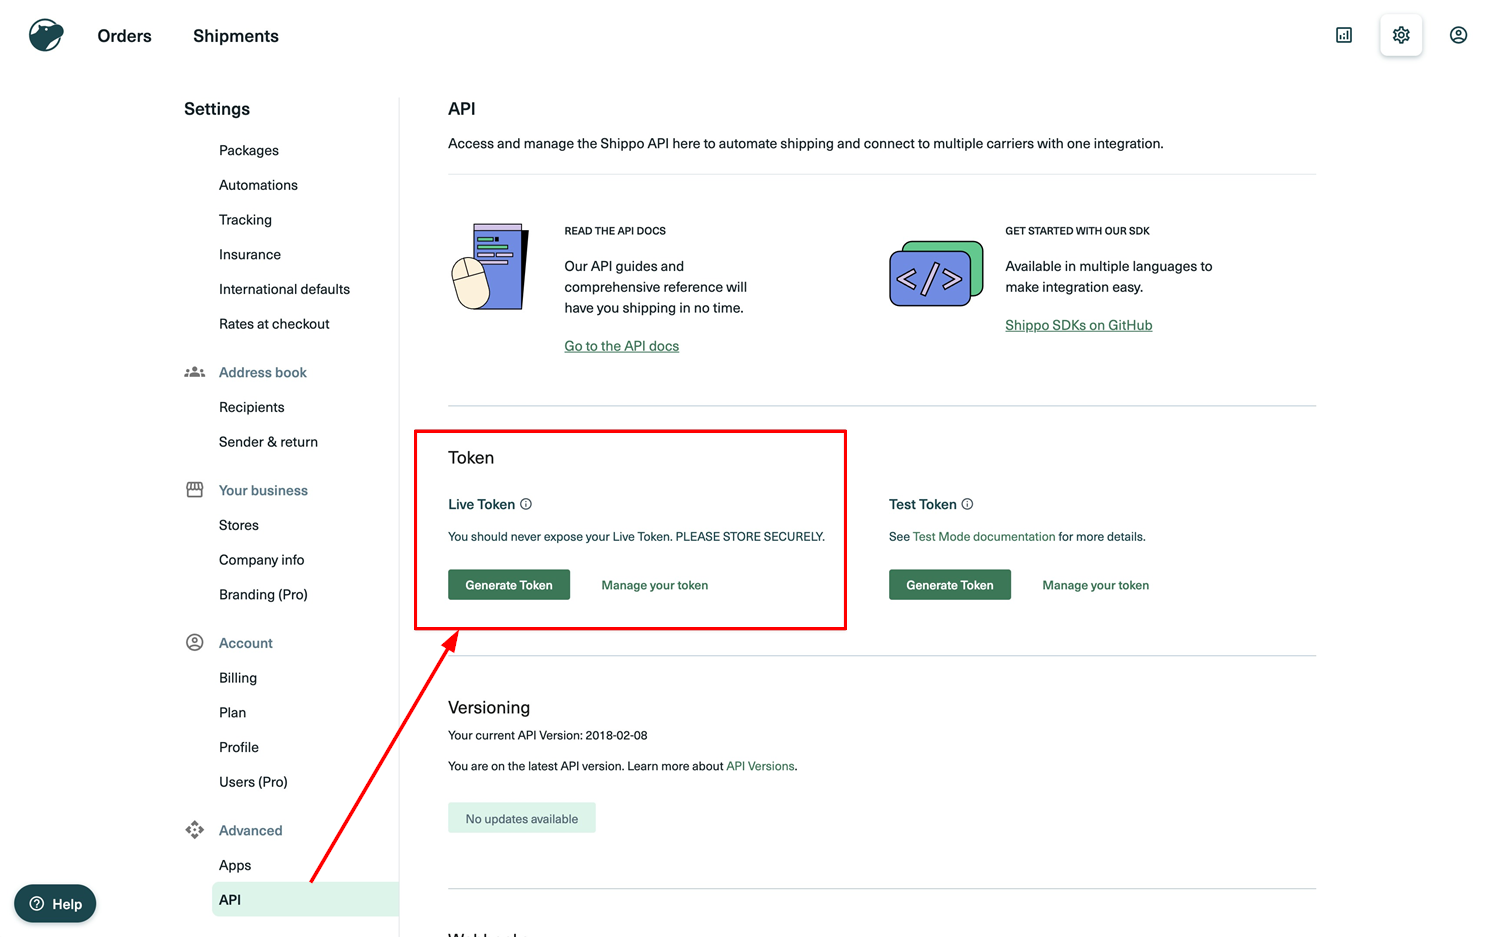
Copy the token to use in the integration.
Step 2: Configure Package Templates & Shipping Options in Shippo
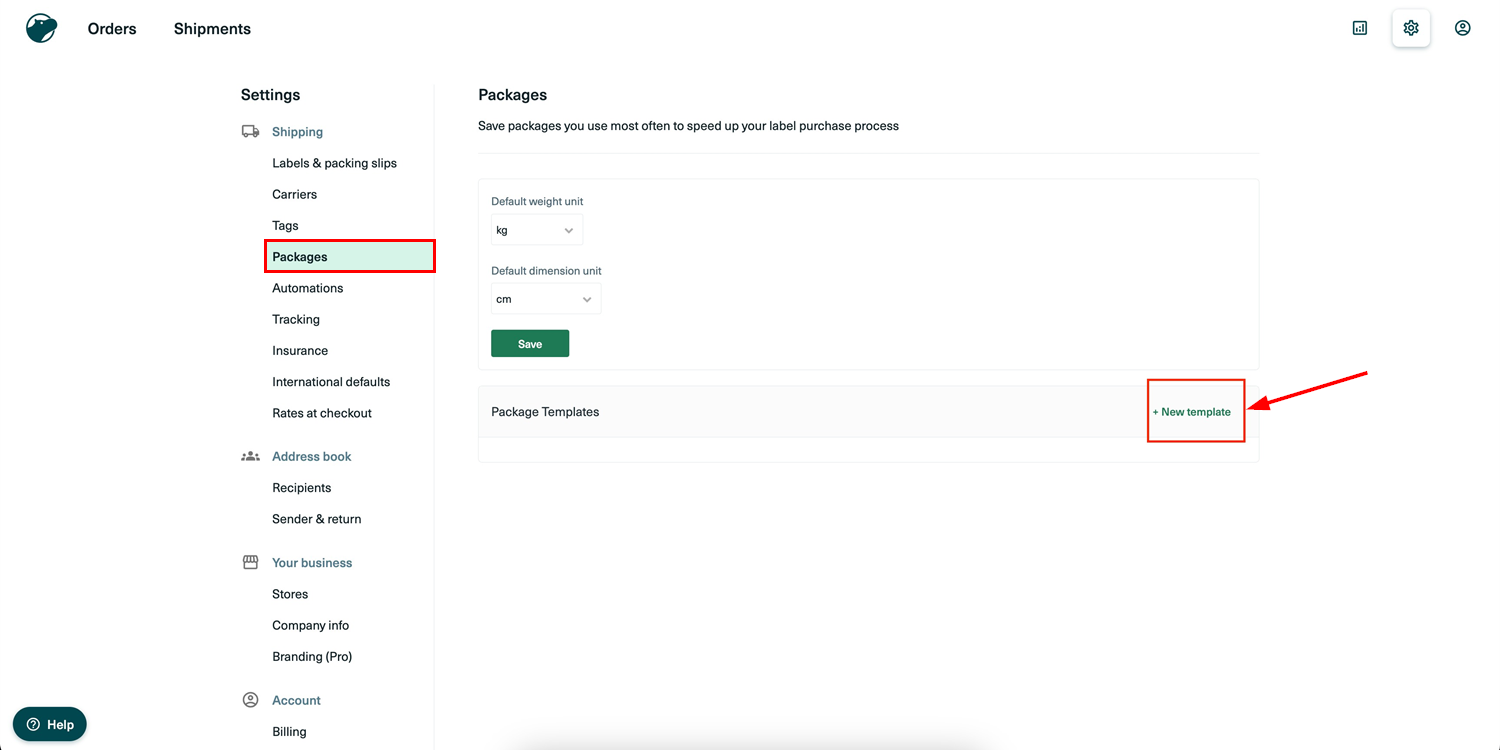
- Setting Up a Package Template: Access the Package Template settings via Settings > Shipping > Packages > + New Template. You can either input custom dimensions or select a standard carrier-provided parcel size. If using a standard carrier parcel, make sure to set the package weight and mark it as the default template if needed.
- Setting Up the Shipping Origin: Define the sender and return addresses by going to Settings > Address Book > Sender & Return > Add New Address. Enter the complete address and select it as the default if required.

- Configuring Shipping Options: Set up shipping options by navigating to Settings > Shipping > Rates at Checkout > Add Shipping Option. Choose the "Live Rate" option and select the desired carrier services. You can also add a markup fee to the delivery cost, either as a percentage or a fixed amount. Define fallback delivery fees in case live rates aren't available. The chosen shipping option name will appear during checkout.

Step 3: Set Up Shipping Origin in Your eCommerce Store
In your eCommerce store's payment section, configure the shipping origin, which will serve as the sender's address when creating orders in Shippo. This can be accessed via Payments > Settings > Shipping Origin. Make sure the address is valid to avoid errors during label creation in Shippo.

Step 4: Input Live Token
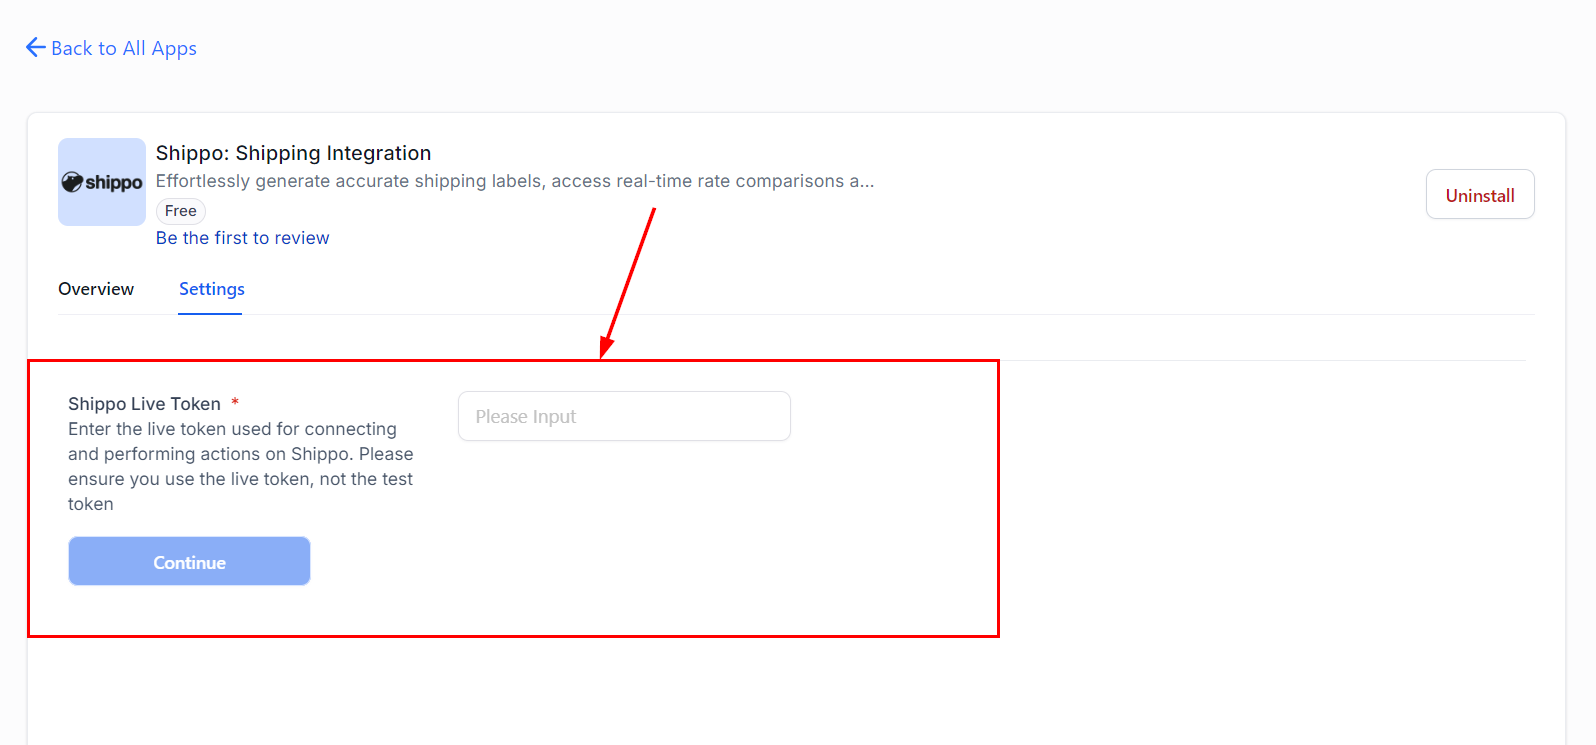
From the Integrations page in Settings, search for and install the Shippo application if prompted.

Once installed, input the live token generated in Step 1 to continue.
Step 5: Enable/Disable Live Shipping Rates
Enable live shipping rates after setting up the package template, shipping origin, and shipping options in Shippo and click Save.

If there's an issue with the setup, an error message will appear.

By integrating Shippo with your eCommerce store, you get full control over your shipping operations, so you can offer real-time rates and reliable delivery options. This improves customer satisfaction and makes your shipping processes more efficient and customer-focused.